Import Wizard
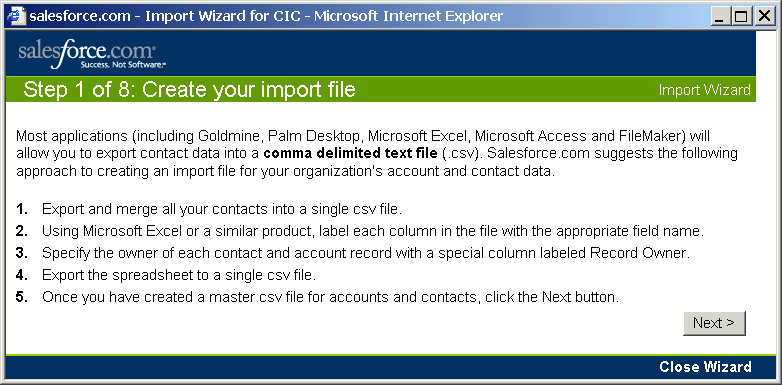
Step 1 of 8: Create your import file
Step 2 of 8: Upload your file - ACCTCONT.CSV
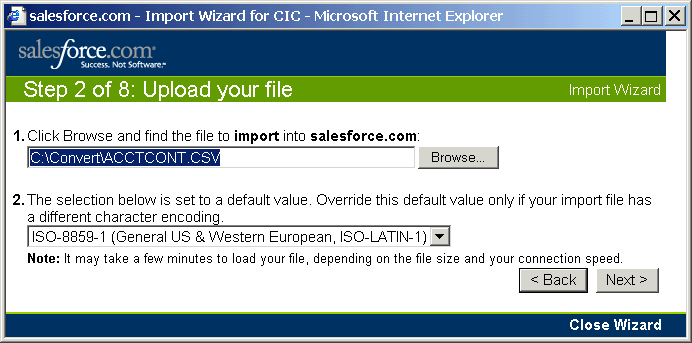
Note: Clicking Back to Step 2 will start all over with a new CSV
Step 3 of 8: Map Contact Fields
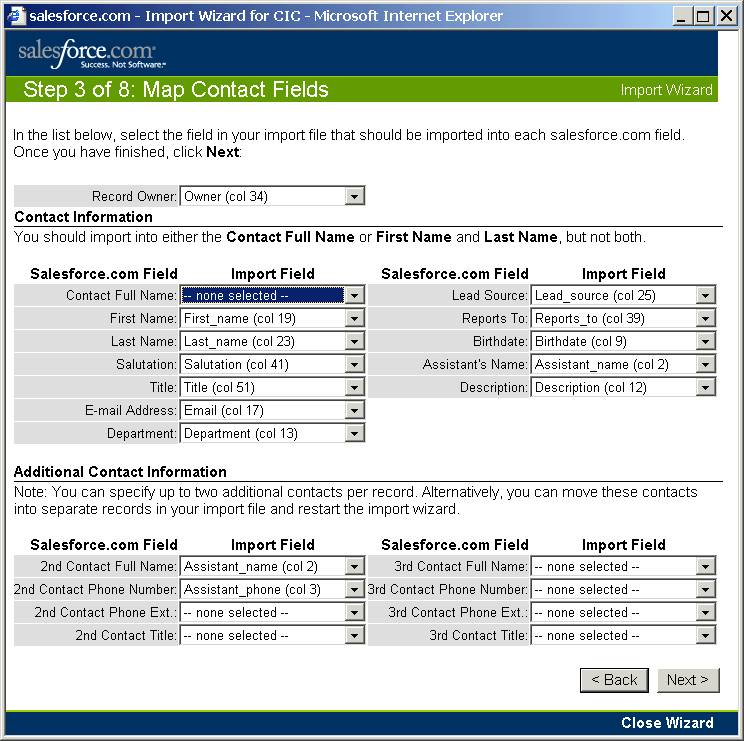
Note: Make Contact Full Name --none selected ---
and enter First_name and Last_name
Change Description from Short to full Description
Step 4 of 8: Map Contact Phone and Address Fields

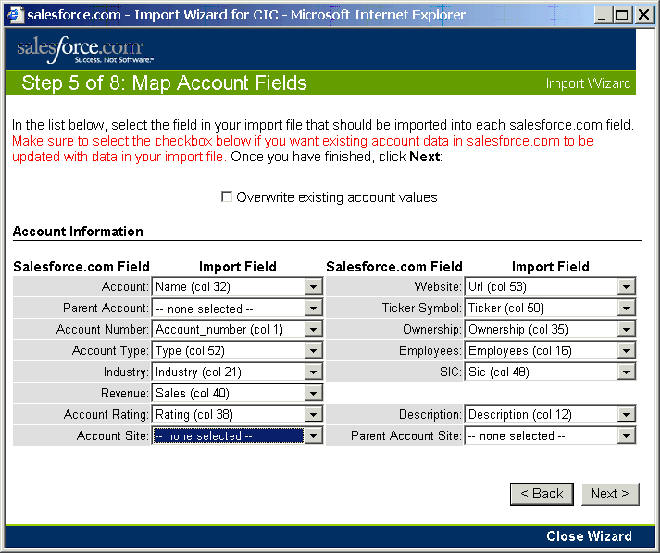
Step 5 of 8: Map Account Fields
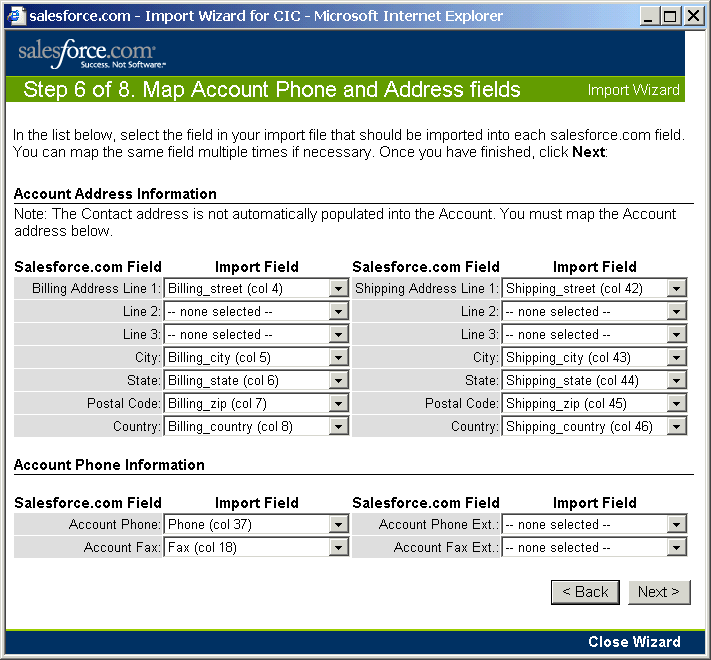
Step 6 of 8: Map Account Phone and Address fields
Step 7 of 8: Unmapped Import Fields
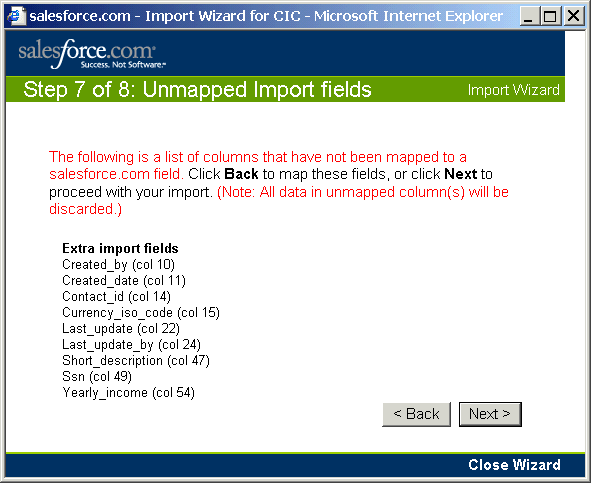
At this point, if you want the fields, you will need to go back
and make the fields in SalesForce, then do the Import Wizard all over again.
SSN and Yearly_income are custom fields, not usually seen.
Step 8 of 8: Review and Confirm
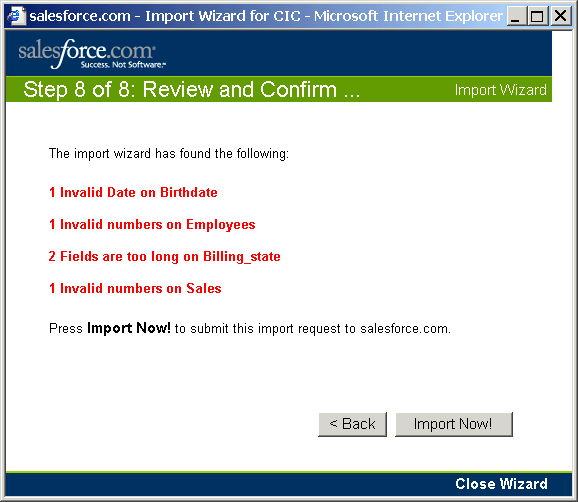
Don't worry about these, which are due to the field names
in the fields used for error checking purposes, such as "Birthdate" in the date
field
Request Submitted
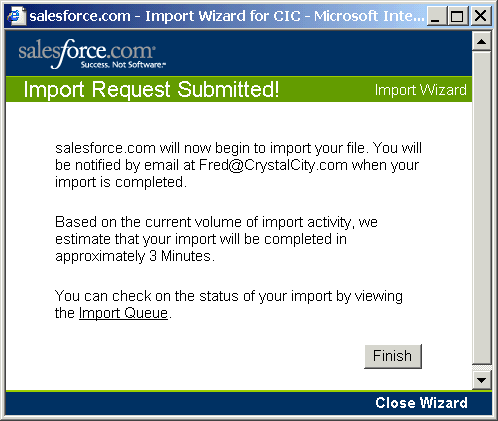
Wait a few minutes and it will be done.
www.youtube.com/watch?v=2zw49rTrcdg
Now, let's check the results